I’ve finally gotten down to trying MUAC’s At-Home 40% Glycolic Acid Peel yesterday. It has been lying there beckoning for my attention since 2 months ago when I first bought it, together with 40% Lactic Acid Peel, 5 Acid Body Peel, 15% TCA peel and some other products.

Why I Procrastinated on Glycolic Acid Peel
So far, I’ve only tried the lactic acid and body peel because I read that they were milder. They were indeed.
Glycolic acid on the other hand was supposed to be made of finer molecules and hence can penetrate deeper into the skin. It is known to be harsher to the skin than Lactic acid. That’s why I’d procrastinated for so long.
Since Glycolic acid is just a superficial peel, why was I afraid? I’d done stronger peel that included a 7-day downtime (such as VI Peel). Well, it’s because I’m gonna DIY. Would I burn or scar my face?
Lactic vs Glycolic vs Salicylic Peels – What’s the Difference?
There are ample online resources on their difference. So I’ll summarize this very briefly.
All the above are superficial peels (read more about peel categories).
- Lactic acid is the mildest and would be good for those with pigmentation. It’s also recommended for those with sensitive skin or rosacea.
- Glycolic acid is harsher, but can boost collagen production in addition to treating dark spots and acne.
- Salicylic acid is suitable for those who suffer from acne problem.
MUAC 40% Glycolic Acid Peel
There are various sizes that you can order online. I got myself the 1 oz kit (30ml) kit, which comprises 1) 30ml of pH Prep Solution and 2) 30ml of 40% Glycolic Acid.
It costs USD20.75 before discount, and comes in an easy-to-dispense bottle.

It was also properly sealed to prevent any spillage during shipment.

How to Apply 40% Glycolic Acid?
The 40%% Glycolic Acid kit comes with an instruction brochure, telling you step by step on what is needed.

If you like to know whether such a peel should be left to the Professionals, you may take a look at a checklist in this post.
Step 1: Do a patch test on a sensitive area (e.g. neck)
I actually skipped the patch test because I was impatient. I was also aware of how my skin could generally take quite well to chemical peel. However, I don’t recommend that you follow suit as the risks involved could be irreversible if you happen to be allergic to glycolic acid or acid in general.
Step 2: Cleanse your face
Extracted from Instruction Brochure
“All acid peels work best when the skin hasn’t been cleansed with overly-alkaline products which contain soap….”
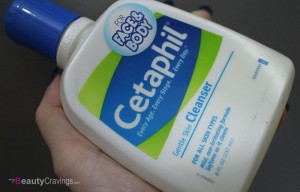
Make sure you use a soap-free cleanser, such as Cetaphil.

Step 3: Wipe your face with pH Prep Solution
Acid will only work well if your face is free of grease or sebum. When I did my VI Peel, the aesthetician rubbed my face (pretty vigorously) with acetone (something that smells like nail polish remover).
So I did the exact same thing, i.e. wiping my face vigorously with a facial cotton that was soaked in pH Prep solution. This solution also smells like nail polish remover.

Allow the solution to dry.
Step 4: Apply 40% Glycolic Acid
I tried to follow the instruction, i.e. to squeeze the glycolic acid serum onto my fingertips. However, this is not achievable because the acid has the same thin consistency as water. It is impossible to place it on my fingertips without it running down my fingers.
This is different from my experience with lactic acid and body peel from MUAC. Those come in thicker consistency.
I fumbled a little. In the end, I squeezed it onto my palm. I’m sure my palm would peel 4 days later.

Step 5: Leave it on for between 1 to 12 minutes
The recommendation is to have it on for only 1 minute during the first attempt, and subsequently adding 1 minute per week to the maximum of 12 minutes.
I had it on for a total of 2.5 minutes during my first attempt as I’m not new to chemical peel. The acid caused a slight stinging sensation that was stronger than my experience with both lactic acid and body peel, but was still considered pretty manageable.
- Pain Level =1/5
Step 6: Rinse off acid with a wash cloth of soap and water
Lather some soap into a wash cloth and use it to wipe off the acid. Then rinse thoroughly with water.
I look pretty stressed huh? LOL. Full concentration was required to ensure that non of this liquid enters the eyes.

Here’s how I look after the rinse-off.

I don’t think there’s any pronounce redness from the application. If you want to see a lobster effect from a medium peel, check out this post.
3-hour Post-Peel
After about 3 hours, my face became oilier and more flushed. The corner of my nose was becoming itchy. And my lip felt chapped.
On hindsight, I should have applied Vaseline on the corner of my nose as well as my lips, just like how the aesthetician did it during my VI Peel.

I didn’t do so because of my experience with lactic acid peel. It was so mild that I came to an inaccurate conclusion that all superficial peels are the same.
That’s all folks. Stay tuned to Part 2 of 40% Glycolic Acid peel while I wait for the peeling (if any) to take place.
Hope this review has been helpful! If you like to get notified of my new posts, you can click the button below to subscribe, or connect with me through facebook or instagram. See you there!
This post may contain affiliate links, meaning I earn a commission if you make a purchase, at no cost to you. Read my full disclosure for more info.


